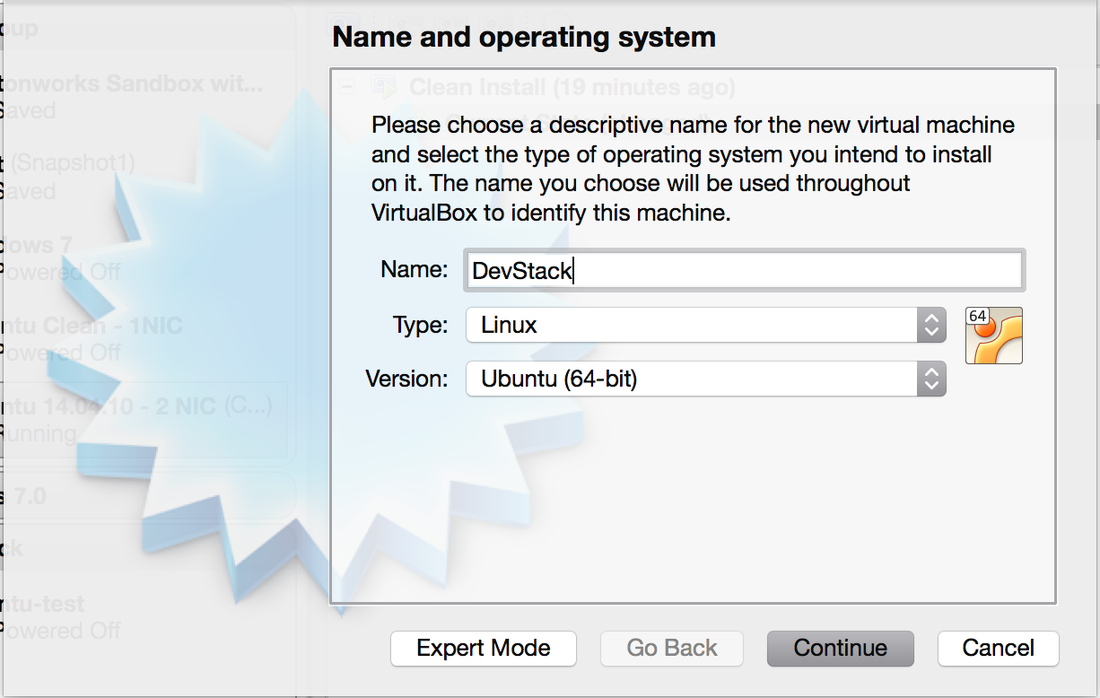
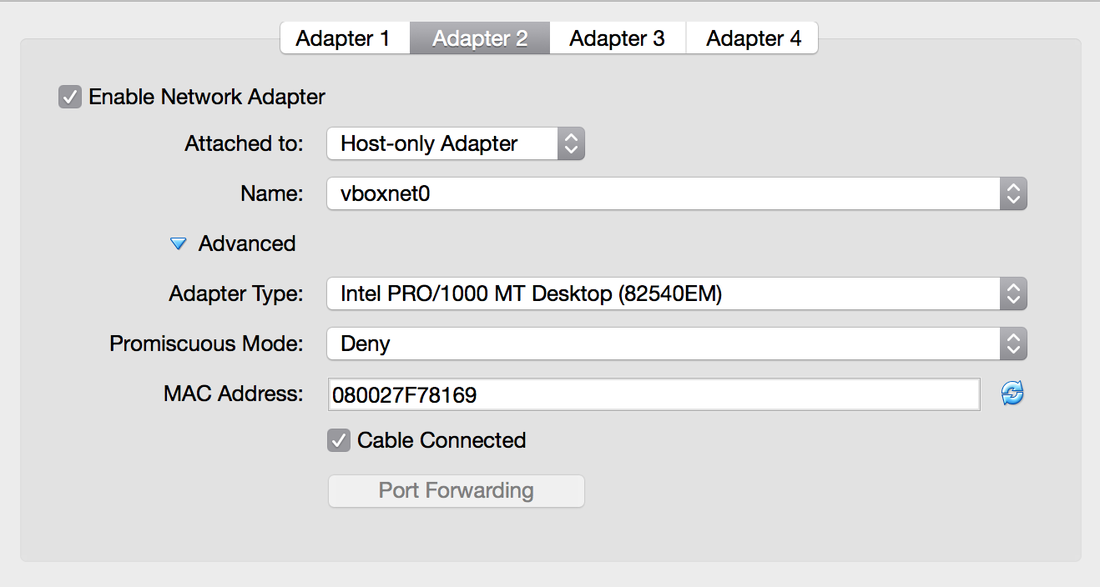
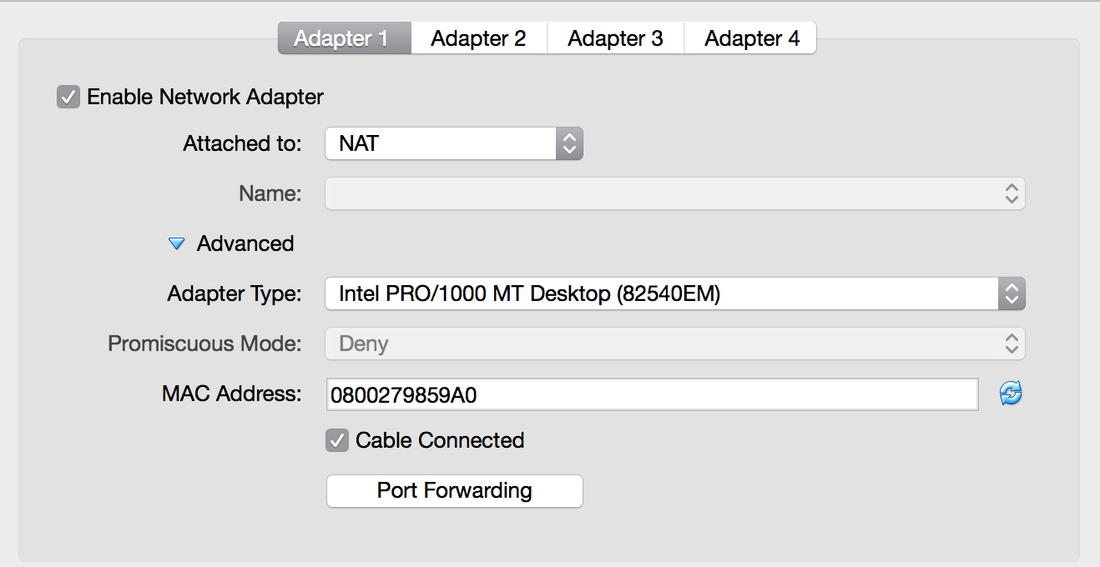
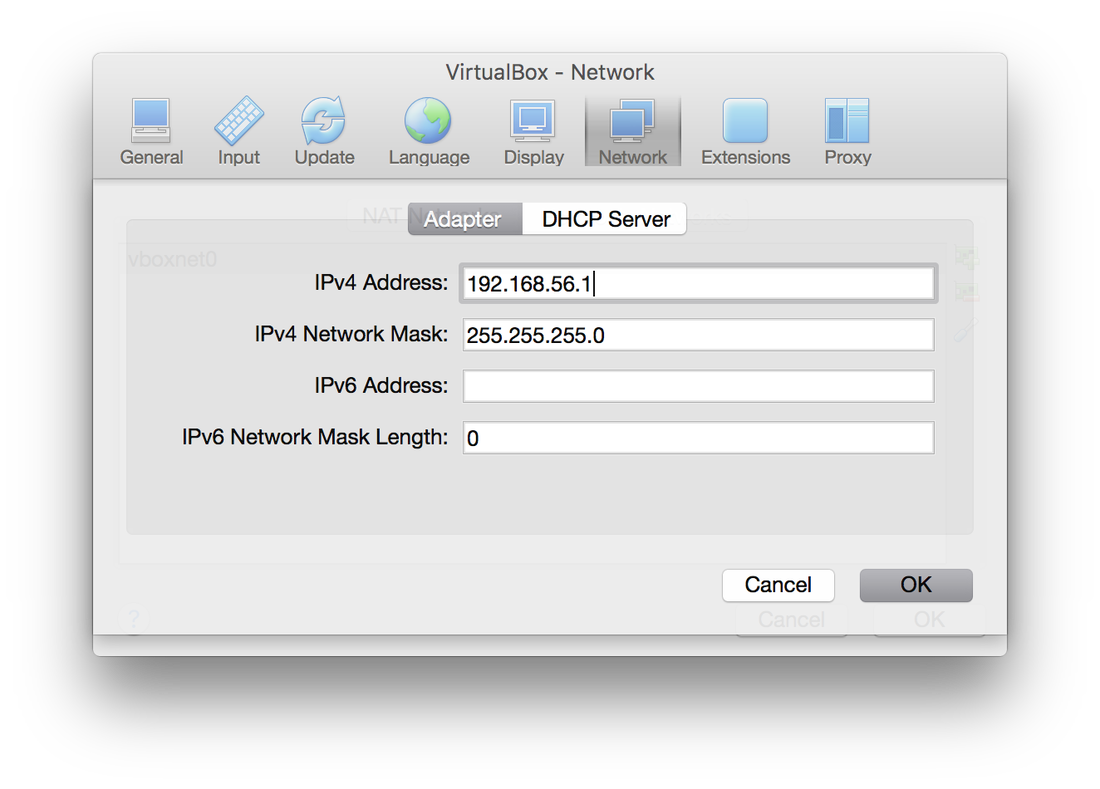
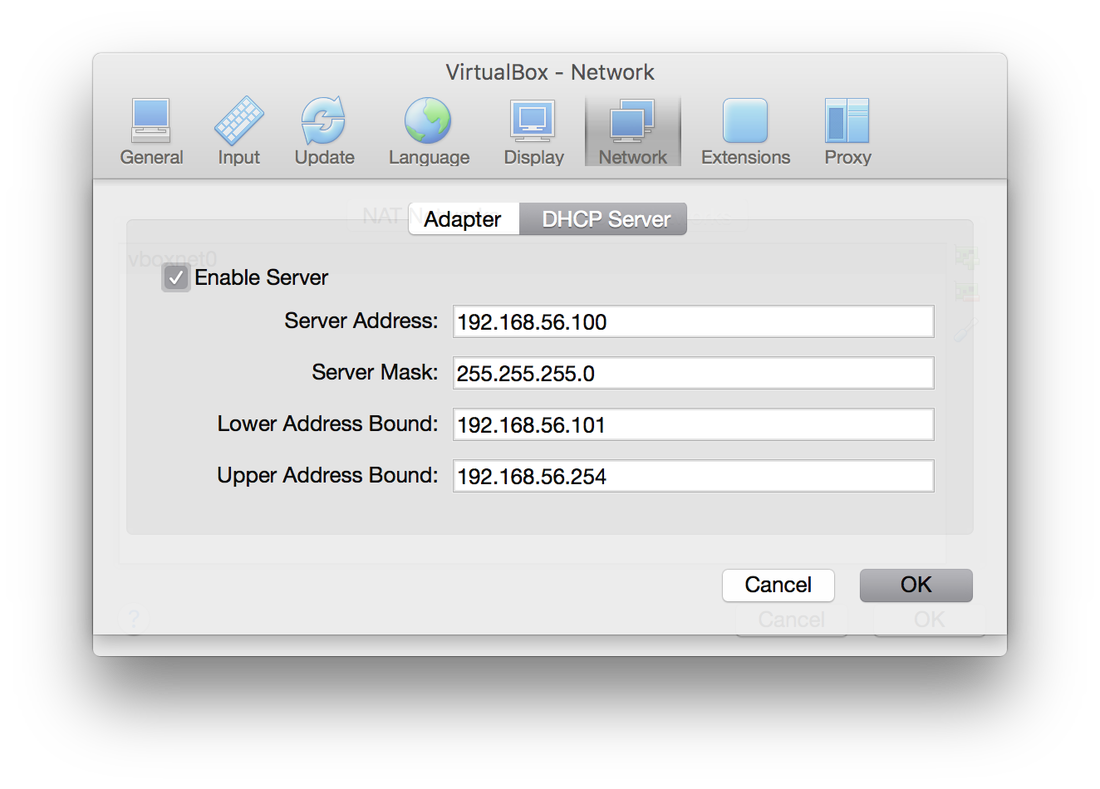
 OpenStack just recently came out with their latest version - Liberty. Below I will show you a quick tutorial on how to install your own DevStack on your laptop inside of a VirtualBox environment. Things you need: 64-Bit Laptop (I'm using a macbook pro running Mac OS 10.11.1) VirtualBox (I'm using 5.0.8 r103449) Ubuntu Server Image. Setting up VirtualBox I started off by creating a new VirtualBox Image called DevStack with 8192MB (8GB of RAM), 2 cores, and a 60GB Dynamically Allocated VDI storage. These are DevStacks recommended settings and will allow you to create a few instances of larger sizes. Please note, DevStack states that you can go as low as 1GB of RAM, however, I had issues with the installation completing. They recommend those settings for only creating one small instance. I would highly recommend doing as close to the recommended settings as possible or better if available. First create a Host-only Network called vboxnet0 (this can be found in the preferences of VirtualBox itself). The properties of that network are as follows (Pictures can be seen in the gallery). Once created go into the settings of your instance and modified the network adaptors. Adaptor 1 will be NAT, Adaptor 2 is a Host-only Adaptor attached to vboxnet0. Adaptor: IPv4 address: 192.168.56.1 IPvNetwork Mask: 255.255.255.0 DHCP Server Enabled: Server Address: 192.168.56.100 Server Mask 255.255.255.0 Lower Address Bound: 192.168.56.101 Upper Address Bound: 192.168.56.254 Installing Ubuntu Server and configurations At this point, I installed Ubuntu Server 14.04.3 LTS. I wont go through all of the details of setting up a server. But a few quick highlights:
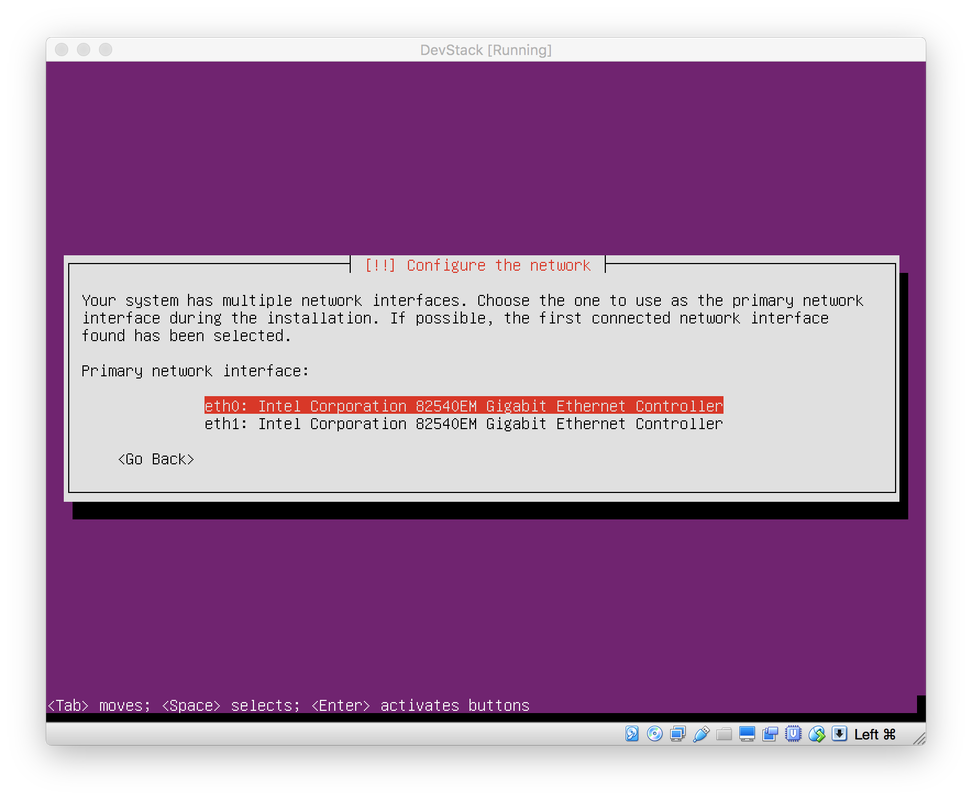
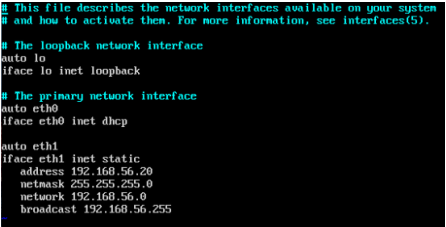 Now that we have Ubuntu server installed, we can get into the meat of installing DevStack (It's very simple, honest). Before we start to install DevStack, we want to make sure your network configurations are configured properly. $ ifconfig What you want to see is both eth0 and eth1 with an ip address. However, you'll likely only see eth0 with an IP address and nothing for eth1. So eth1 will need to be created and made a static IP that way you can always access it on the same IP address and also so that DevStack doesn't get crash because the IP changes due to eth0 being dynamic. So, first go to the following file: /etc/network/interfaces. You will need to add the following 6 lines to the end of the file so it can be reflected like the image on the right. auto eth1 iface eth1 inet static address 192.168.56.20 netmask 255.255.255.0 network 192.168.56.0 broadcast 192.168.56.255 Once this is complete, you can reboot your instance and run the ifconfig command once more and you should see both eth0 and eth1 appear. At this point you can SSH into your instance using your normal SSH client with the IP address used above, 192.168.56.20. Installing DevStack $ sudo apt-get install git $ git clone https://git.openstack.org/openstack-dev/devstack -b stable/liberty These two commands install git and clone the DevStack repository for the stable version of liberty. Next, change directory into DevStack and launch the installer: $ cd devstack/ $ ./stack.sh Now DevStack will install. Throughout the installation it will ask you for passwords. You can fill them out or let the be generated automatically. The file that they get saved to will be in: /devstack/samples/local.conf Once the installation is complete, you should see a nice printout on the screen indicating how to connect to horizon, keystone, how to run some examples and the default users and their passwords. It also mentions your host IP and how long it took to complete. At this point, you will likely notice that your host IP is different than the static IP that you created earlier, it's time to change it. 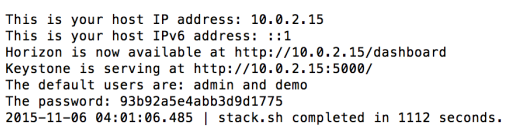 How to Migrate Keystone to Another IP address: This process is important for me at least to always have a uniform IP address on what is public and on how to access it. The IP address that DevStack uses are linked in a database and files. That means as you reboot your system or bring your laptop to other location and your instance acquirers a new IP, DevStack will cease to function properly. There are many ways to update the IP address. I perhaps do a simpler method, but have yet to find any issues with it. First go into your openrc file and search for these lines: if [[ $SERVICE_IP_VERSION == 6 ]]; then HOST_IPV6=${HOST_IPV6:-::1} SERVICE_HOST=${SERVICE_HOST:-[$HOST_IPV6]} GLANCE_HOST=${GLANCE_HOST:-[$HOST_IPV6]} else HOST_IP=${HOST_IP:-127.0.0.1} SERVICE_HOST=${SERVICE_HOST:-$HOST_IP} GLANCE_HOST=${GLANCE_HOST:-$HOST_IP} fi I am not using IPv6, so, I updated the HOST_IP line to the following: HOST_IP=${HOST_IP:-192.168.56.20} Once this was complete, I ran $ source openrc What this does, is many of the services reference that initial HOST_IP so updating that, will update all of them once you source it. At this point you can open your favorite web browser and type in 192.168.56.20 and your horizon dashboard should appear. Remember! That password that was printed out just after DevStack finished is your password for the admin account. Also, this is a GREAT time to take a snapshot in VirtualBox so you can always revert back to a fresh install of DevStack. Good luck coding! UPDATE (12/28/2015): I realized that my OS_AUTH_URL still reported as wrong when I downloaded my credentials, so here is how to fix that. First, you'll need to log into the sql database. $ mysql -u root keystone $ select id, url from endpoint where interface='public'; You should see a list of url's and id's, for my auth_url, I used the following command to update it to my static IP: $ update endpoint set url='http://192.168.56.20:5000/v2.0' where id='f268eed3e55c4395831809546e36acd8'; then restart your apache2 service: sudo /etc/init.d/apache2 restart at this point when you download your source file, you'll see that the auth_url is now correct. |
AuthorJames Benson is an IT professional. 
Archives
August 2022
Categories
All
|
 RSS Feed
