|
A while back I wrote about how to deploy Openstack Ocata, considering that was 4 years ago I thought it best to update how to deploy Openstack. A few items first.
AIMS:
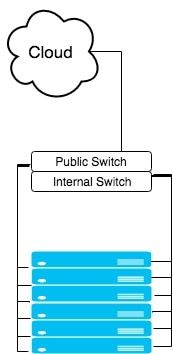
In this post, we will still be using Kolla - Xena, we will still have our 3 network planes (for public - 10.245.x.x, private - 192.168.x.x, and data networks - 10.100.x.x), at least 4 servers (3 controllers and 1 compute) with Ubuntu 20.04 LTS deployed on them. On the public network, you'll want to have a bridge and virtual interfaces (or at least that's how I deploy it. Let me know in the comments how your networking is done.). Check out the code snippet below on how I do that consistently after each reboot. The data network needs to be high speed 10G or better, private and public can be 1G if necessary but generally speaking, higher is always better ;-) sudo sh -c "cat > /etc/rc.local <<__EOF__ #!/bin/sh -e ip a | grep -Eq ': veno1.*state UP' || sudo ip link add veno0 type veth peer name veno1 ip link set veno0 up ip link set veno1 up ip link set veno0 master br0 exit 0 __EOF__" sudo chmod +x /etc/rc.local sudo chmod 755 /etc/rc.local sudo chown root:root /etc/rc.local sudo /etc/rc.local After our network is properly setup, we can bootstrap kolla. It's highly recommended to setup a virtual environment for Kolla so that nothing interferes with it. To do so, we will install a few python packages to setup the venv, install kolla and ansible, optimize ansible so it's a bit faster, then copy the kolla files (global and multinode) to the correct spaces. # "$HOME"/requirements.txt contents: # ansible<ANSIBLE_MAX_VERSION # https://tarballs.opendev.org/openstack/kolla-ansible/kolla-ansible-stable-OPENSTACK_RELEASE.tar.gz OPENSTACK_RELEASE=xena ANSIBLE_MAX_VERSION=5.0 # Dependencies sudo apt-get update sudo apt-get -qqy install python3-dev libffi-dev gcc libssl-dev python3-pip python3-venv # basedir and venv sudo mkdir -p /opt/kolla sudo chown "$USER":"$USER" /opt/kolla cd /opt/kolla python3 -m venv venv source venv/bin/activate python3 -m pip install -U pip wheel # Update requirements file sed -i s/OPENSTACK_RELEASE/"${OPENSTACK_RELEASE}"/ "$HOME"/requirements.txt sed -i s/ANSIBLE_MAX_VERSION/"${ANSIBLE_MAX_VERSION}"/ "$HOME"/requirements.txt python3 -m pip install -r "$HOME"/requirements.txt # General Ansible config sudo mkdir -p /etc/ansible sudo chown "$USER":"$USER" /etc/ansible cat > /etc/ansible/ansible.cfg <<__EOF__ [defaults] host_key_checking=False pipelining=True forks=100 interpreter_python=/usr/bin/python3 timeout = 30 __EOF__ # Configure kolla sudo mkdir -p /etc/kolla sudo chown "$USER":"$USER" /etc/kolla cp -r /opt/kolla/venv/share/kolla-ansible/etc_examples/kolla/* /etc/kolla || true cp /opt/kolla/venv/share/kolla-ansible/ansible/inventory/* . || true Once that is complete, we want to make sure:
After that, we can do two things simultaneously:
If we want to enable swift via ceph (i.e. enable radosgw), in the ceph tab below you'll see a line to enable swift. That refers to the swift tab. If you want to skip swift, then don't worry about the swift tab and just do everything else in the ceph tab. There were a couple of items that really tripped me up with getting rados to work properly. The first was with TLS enabled, we need to install the certificates into the system to be able to curl the endpoints properly. To do this, copy the certificates in the /etc/kolla/certificates/private to all of the servers ca-certificates folder: /usr/local/share/ca-certificates/ and `update-ca-certificates`. The next issue was getting the ports properly configured. Keep them set to 7480 as indicated. I'm not sure why, but in the globals file there is a line: #ceph_rgw_port: 7480 keep this line commented, otherwise, for me, uncommenting it and keeping it 7480, my HAProxy would fail to deploy. I do not know why, but that is what happened. So just keep that in mind. Also, port 7480 previously was used for Civetweb (depricated as of pacific), however, as of pacific, this is the default port of Beastmode. Lastly, and the biggest thing that tripped me up is the configuration file for swift, along with each of the radosgw that is deployed on, you need to have the same configuration for "client.rgw.default". I'm bolding that because it literally took me 2 weeks to figure that out. It is not documented anywhere and nearly impossible to find anything online about it. I only found it in one mail thread. Once the configs are set, you'll want to restart your rgw's using the "sudo ceph orch restart <cluster>" command. Lastly, one of the global options is only available from Xena onwards, so if you are trying to install something on an older openstack version, you'll likely run into some issues. And on that same note, the endpoints that are created, aren't 100% perfect and they'll need to be modified. By default, they are just 'http.../v1/...', they need to have 'http.../swift/v1/...''. Updating the endpoint needs to happen after the deploy of course. # These initial groups are the only groups required to be modified. The # additional groups are for more control of the environment. [control] # These hostname must be resolvable from your deployment host 192.168.1.40 192.168.1.38 192.168.1.36 # The above can also be specified as follows: #control[01:03] ansible_user=kolla # The network nodes are where your l3-agent and loadbalancers will run # This can be the same as a host in the control group [network] 192.168.1.40 192.168.1.38 192.168.1.36 [compute] 192.168.1.28 [monitoring] # When compute nodes and control nodes use different interfaces, # you need to comment out "api_interface" and other interfaces from the globals.yml # and specify like below: #compute01 neutron_external_interface=eth0 api_interface=em1 storage_interface=em1 tunnel_interface=em1 [storage] 192.168.1.40 192.168.1.38 192.168.1.36 192.168.1.28 [deployment] localhost ansible_connection=local kolla_base_distro: "centos" kolla_install_type: "source" network_interface: "eno1" kolla_external_vip_interface: "br0" neutron_external_interface: "veno1" keepalived_virtual_router_id: "63" kolla_internal_vip_address: "192.168.1.63" kolla_external_vip_address: "10.245.121.63" kolla_enable_tls_internal: "yes" kolla_enable_tls_external: "yes" kolla_enable_tls_backend: "yes" rabbitmq_enable_tls: "yes" kolla_copy_ca_into_containers: "yes" openstack_cacert: "{{ '/etc/pki/tls/certs/ca-bundle.crt' if kolla_enable_tls_external == 'yes' else '' }}" glance_backend_ceph: "yes" glance_backend_file: "no" glance_enable_rolling_upgrade: "yes" enable_cinder: "yes" ceph_nova_user: "cinder" cinder_backend_ceph: "yes" cinder_backup_driver: "ceph" nova_backend_ceph: "yes" # Swift (radosgw) options: enable_ceph_rgw: true # Feature from Xena onwards enable_swift: "no" # Feature for swift on disk, not through ceph. enable_swift_s3api: "yes" enable_ceph_rgw_keystone: true ceph_rgw_swift_compatibility: true ceph_rgw_swift_account_in_url: true enable_ceph_rgw_loadbalancer: true ceph_rgw_hosts: - host: r1-710-40 ip: 192.168.1.40 port: 7480 - host: r1-710-38 ip: 192.168.1.38 port: 7480 - host: r1-710-36 ip: 192.168.1.36 port: 7480 docker_registry: "10.245.0.14" docker_registry_insecure: "yes" docker_registry_username: "kolla" enable_mariabackup: "no" enable_haproxy: "yes" kolla_external_fqdn: "optional.fqdn.com" echo "deb http://download.opensuse.org/repositories/devel:/kubic:/libcontainers:/stable/xUbuntu_$(lsb_release -rs)/ /" | sudo tee /etc/apt/sources.list.d/devel:kubic:libcontainers:stable.list curl -fsSL https://download.opensuse.org/repositories/devel:kubic:libcontainers:stable/xUbuntu_"$(lsb_release -rs)"/Release.key | gpg --dearmor | sudo tee /etc/apt/trusted.gpg.d/devel_kubic_libcontainers_stable.gpg > /dev/null # Update to fetch the package index for ceph added above sudo apt-get update sudo apt-get -qqy install podman podman --version MONITOR_IP=$1 CEPH_RELEASE=pacific # Update to fetch the latest package index sudo apt-get update # Fetch most recent version of cephadm curl --silent --remote-name --location https://github.com/ceph/ceph/raw/"$CEPH_RELEASE"/src/cephadm/cephadm chmod +x cephadm sudo ./cephadm add-repo --release "$CEPH_RELEASE" # Update to fetch the package index for ceph added above sudo apt-get update # Install ceph-common and cephadm packages sudo ./cephadm install ceph-common sudo ./cephadm install sudo mkdir -p /etc/ceph sudo ./cephadm bootstrap --mon-ip "$MONITOR_IP" # Turn on telemetry and accept Community Data License Agreement - Sharing sudo ceph telemetry on --license sharing-1-0 sudo ceph -v sudo ceph status sudo ceph orch host ls sudo ceph orch device ls --refresh sudo ceph orch apply osd --all-available-devices # Create pool for Cinder sudo ceph osd pool create volumes sudo rbd pool init volumes # Create pool for Cinder Backup sudo ceph osd pool create backups sudo rbd pool init backups # Create pool for Glance sudo ceph osd pool create images sudo rbd pool init images # Create pool for Nova sudo ceph osd pool create vms sudo rbd pool init vms # Create pool for Gnocchi #sudo ceph osd pool create metrics #sudo rbd pool init metrics # Enable swift, 1 for refstack, 3 for production source "$HOME"/swift_settings.sh 3 # Get cinder and cinder-backup ready sudo mkdir -p /etc/kolla/config/cinder/cinder-backup sudo chown -R ubuntu:ubuntu /etc/kolla/config/ sudo cp /etc/ceph/ceph.conf /etc/kolla/config/cinder/cinder-backup/ceph.conf sudo ceph auth get-or-create client.cinder-backup mon 'profile rbd' osd 'profile rbd pool=backups' mgr 'profile rbd pool=backups' > /etc/kolla/config/cinder/cinder-backup/ceph.client.cinder-backup.keyring sudo ceph auth get-or-create client.cinder mon 'profile rbd' osd 'profile rbd pool=volumes, profile rbd pool=vms, profile rbd pool=images' mgr 'profile rbd pool=volumes, profile rbd pool=vms, profile rbd pool=images' > /etc/kolla/config/cinder/cinder-backup/ceph.client.cinder.keyring sudo sed -i $'s/\t//g' /etc/kolla/config/cinder/cinder-backup/ceph.conf sudo sed -i $'s/\t//g' /etc/kolla/config/cinder/cinder-backup/ceph.client.cinder.keyring sudo sed -i $'s/\t//g' /etc/kolla/config/cinder/cinder-backup/ceph.client.cinder-backup.keyring # Get cinder-volume ready sudo mkdir -p /etc/kolla/config/cinder/cinder-volume sudo chown -R ubuntu:ubuntu /etc/kolla/config/ sudo cp /etc/ceph/ceph.conf /etc/kolla/config/cinder/cinder-volume/ceph.conf sudo ceph auth get-or-create client.cinder > /etc/kolla/config/cinder/cinder-volume/ceph.client.cinder.keyring sudo sed -i $'s/\t//g' /etc/kolla/config/cinder/cinder-volume/ceph.conf sudo sed -i $'s/\t//g' /etc/kolla/config/cinder/cinder-volume/ceph.client.cinder.keyring # Get glance ready sudo mkdir -p /etc/kolla/config/glance sudo chown -R ubuntu:ubuntu /etc/kolla/config/ sudo cp /etc/ceph/ceph.conf /etc/kolla/config/glance/ceph.conf sudo ceph auth get-or-create client.glance mon 'profile rbd' osd 'profile rbd pool=volumes, profile rbd pool=images' mgr 'profile rbd pool=volumes, profile rbd pool=images' > /etc/kolla/config/glance/ceph.client.glance.keyring sudo sed -i $'s/\t//g' /etc/kolla/config/glance/ceph.conf sudo sed -i $'s/\t//g' /etc/kolla/config/glance/ceph.client.glance.keyring # Get nova ready sudo mkdir -p /etc/kolla/config/nova sudo chown -R ubuntu:ubuntu /etc/kolla/config/ sudo cp /etc/ceph/ceph.conf /etc/kolla/config/nova/ceph.conf sudo ceph auth get-or-create client.cinder > /etc/kolla/config/nova/ceph.client.cinder.keyring sudo sed -i $'s/\t//g' /etc/kolla/config/nova/ceph.conf sudo sed -i $'s/\t//g' /etc/kolla/config/nova/ceph.client.cinder.keyring # Get Gnocchi ready #sudo mkdir -p /etc/kolla/config/gnocchi #sudo chown -R ubuntu:ubuntu /etc/kolla/config/ #sudo cp /etc/ceph/ceph.conf /etc/kolla/config/gnocchi/ceph.conf #sudo ceph auth get-or-create client.gnocchi mon 'profile rbd' osd 'profile rbd pool=metrics' mgr 'profile rbd pool=metrics' > /etc/kolla/config/gnocchi/ceph.client.gnocchi.keyring #sudo sed -i $'s/\t//g' /etc/kolla/config/gnocchi/ceph.conf #sudo sed -i $'s/\t//g' /etc/kolla/config/gnocchi/ceph.client.gnocchi.keyring # Verify all permissions are correct. sudo chown -R ubuntu:ubuntu /etc/kolla/config/ sudo ceph status #!/bin/bash set -euxo pipefail NUM_OF_WHOS=$1 sudo ceph orch apply rgw osiasswift --port=7480 --placement="$NUM_OF_WHOS" # Default port results in port conflict and fails. sudo ceph dashboard set-rgw-api-ssl-verify False sudo ceph orch apply mgr "$HOSTNAME" if [[ $(grep -c ceph_rgw_keystone_password /etc/kolla/passwords.yml) -eq 1 ]] then ceph_rgw_pass=$( grep ceph_rgw_keystone_password /etc/kolla/passwords.yml | cut -d':' -f2 | xargs ) rgw_keystone_admin_user="ceph_rgw" else ceph_rgw_pass=$( grep keystone_admin_password /etc/kolla/passwords.yml | cut -d':' -f2 | xargs ) rgw_keystone_admin_user="admin" fi internal_url=$( grep ^kolla_internal_vip_address: /etc/kolla/globals.yml | cut -d':' -f2 | xargs ) # https://docs.ceph.com/en/latest/radosgw/keystone/#integrating-with-openstack-keystone # https://www.spinics.net/lists/ceph-users/msg64137.html # The "WHO" field in the "ceph config set" needs to be "client.rgw.default" NOT # "client.radosgw.gateway". This can be verified by issuing "ceph config dump" # Additionally, the name of all of the gateways need to be present. WHO_IS="" NUM_WHO_IS=$(echo "$WHO_IS" | wc -w) while [[ "$NUM_WHO_IS" -lt "$NUM_OF_WHOS" ]] do WHO_IS="$(sudo ceph auth ls | grep client.rgw | grep client)" || true echo "Waiting..." sleep 10 NUM_WHO_IS=$(echo "$WHO_IS" | wc -w) done WHO_IS="client.rgw.default $WHO_IS" echo "RGW CLIENTS: $WHO_IS" for WHO in $WHO_IS; do sudo ceph config set "$WHO" rgw_keystone_api_version 3 sudo ceph config set "$WHO" rgw_keystone_url https://"$internal_url":35357 sudo ceph config set "$WHO" rgw_keystone_accepted_admin_roles "admin, ResellerAdmin" sudo ceph config set "$WHO" rgw_keystone_accepted_roles "_member_, member, admin, ResellerAdmin" sudo ceph config set "$WHO" rgw_keystone_implicit_tenants true # Implicitly create new users in their own tenant with the same name when authenticating via Keystone. Can be limited to s3 or swift only. sudo ceph config set "$WHO" rgw_keystone_admin_user "$rgw_keystone_admin_user" sudo ceph config set "$WHO" rgw_keystone_admin_password "$ceph_rgw_pass" # Got from the passwords.yml sudo ceph config set "$WHO" rgw_keystone_admin_project service sudo ceph config set "$WHO" rgw_keystone_admin_domain default sudo ceph config set "$WHO" rgw_keystone_verify_ssl false sudo ceph config set "$WHO" rgw_content_length_compat true sudo ceph config set "$WHO" rgw_enable_apis "s3, swift, swift_auth, admin" sudo ceph config set "$WHO" rgw_s3_auth_use_keystone true sudo ceph config set "$WHO" rgw_enforce_swift_acls true sudo ceph config set "$WHO" rgw_swift_account_in_url true sudo ceph config set "$WHO" rgw_swift_versioning_enabled true sudo ceph config set "$WHO" rgw_verify_ssl true done # Redeploy your rgw daemon sudo ceph orch restart rgw.osiasswift HOSTNAMES=$(sudo ceph orch host ls | grep -v HOST | awk '{print $1}' | tr '\n' ',') sudo ceph orch apply mgr "$HOSTNAMES" # Add back-up mgr hosts Okay, so at this point, Ceph and swift have been installed completely, kolla bootstrap-servers and kolla pull has been completed. Next up, you can kolla-ansible deploy and kolla-ansible post-deploy and install the python-openstackclient. I like creating the flavors as follows. This gives you some general compute (GP), CPU focused compute (CB), and Memory focused compute (MB), and then two options for disk, 20GB or 40GB. openstack flavor create --id 1 --vcpus 1 --ram 2048 --disk 20 gp1.small openstack flavor create --id 2 --vcpus 2 --ram 4096 --disk 20 gp1.medium openstack flavor create --id 3 --vcpus 4 --ram 9216 --disk 20 gp1.large openstack flavor create --id 4 --vcpus 1 --ram 1024 --disk 20 cb1.small openstack flavor create --id 5 --vcpus 2 --ram 2048 --disk 20 cb1.medium openstack flavor create --id 6 --vcpus 4 --ram 4096 --disk 20 cb1.large openstack flavor create --id 7 --vcpus 1 --ram 3072 --disk 20 mb1.small openstack flavor create --id 8 --vcpus 2 --ram 6144 --disk 20 mb1.medium openstack flavor create --id 9 --vcpus 4 --ram 12288 --disk 20 mb1.large openstack flavor create --id 11 --vcpus 1 --ram 2048 --disk 40 gp2.small openstack flavor create --id 12 --vcpus 2 --ram 4096 --disk 40 gp2.medium openstack flavor create --id 13 --vcpus 4 --ram 9216 --disk 40 gp2.large openstack flavor create --id 14 --vcpus 1 --ram 1024 --disk 40 cb2.small openstack flavor create --id 15 --vcpus 2 --ram 2048 --disk 40 cb2.medium openstack flavor create --id 16 --vcpus 4 --ram 4096 --disk 40 cb2.large openstack flavor create --id 17 --vcpus 1 --ram 3072 --disk 40 mb2.small openstack flavor create --id 18 --vcpus 2 --ram 6144 --disk 40 mb2.medium openstack flavor create --id 19 --vcpus 4 --ram 12288 --disk 40 mb2.large Closing notes: I realize that this is a long post and due to the nature of it, complicated. If you have ANY question, please reach out in the comments and I'll try to update the post if anything is unclear. I was mulling over this for weeks, so I don't expect it to work out the first time for you, but hopefully you'll get some nuggets from this. Some things are probably very clear to me after starring at it for so long, so please let me help you make it clear as well. Good luck!
####################
# VIRTUAL INTERFACES
####################
auto eno1

auto eno1:1
iface eno1:1 inet static
    address 192.168.6.31
    netmask 255.255.255.0

auto eno1:2
iface eno1:2 inet static
    name exteno
    address 10.245.126.5
    netmask 255.255.255.0
    gateway 10.245.126.253
    dns-nameservers 10.245.0.10
    mtu 1500
#########################
# END VIRTUAL INTERFACES
#########################
Let's begin....
Node setup: First on all of your controllers, we will need to install bridge-utils and update the /etc/network/interfaces file. In the file below my eno1 is internal and my eno2 is public facing. I converted my eno2 into a bridge:
A few ansible settings that I like to have to help speed up the fun....
[defaults]
host_key_checking=False
pipelining=True
forks=100
gathering=smart
host_key_checking: disables host key checking. This will stop the annoying: WARNING: REMOTE HOST IDENTIFICATION HAS CHANGED! (On by default since V1.3)
pipelining: this will help speed up ansible significantly by reducing the ssh connections. forks: This increases the number of parallel ssh connections you can have. (BY default this is "A very very conservative number since V1.3") gathering: Speeds up fact checking by cacheing the results (New since V1.6) These settings can be set in any of the following (V1.5+): * ANSIBLE_CONFIG (an environment variable) * ansible.cfg (in the current directory) * .ansible.cfg (in the home directory) * /etc/ansible/ansible.cfg
But I usually just set it in my home directory:
~/.ansible.cfg Resources: https://docs.ansible.com/ansible/intro_configuration.html
Quick way to get the inventory of you host and write it to a file:
root@r6-410-1:/home/ubuntu# ansible all -i INVENTORY_FILE -m setup --tree /tmp/facts
This will print the inventory into terminal and write it into a file with the name of the file being the name of the machine listed in your inventory file. This could be either a FQDN or IP address. The file will be in JSON format as well for easy viewing. Enjoy!
Receiving an error like this:
root@r6-410-1:/home/ubuntu# ansible all -i tmp -m setup --tree /tmp/facts
192.168.6.29 | FAILED! => {
    "changed": false,
    "failed": true,
    "module_stderr": "Shared connection to 192.168.6.29 closed.\r\n",
    "module_stdout": "/bin/sh: 1: /usr/bin/python: not found\r\n",
    "msg": "MODULE FAILURE",
    "rc": 0
}
Go to your inventory file and add this:
ansible_python_interpreter=/usr/bin/python3 So your inventory file might look something like this now: 192.168.6.29 ansible_python_interpreter=/usr/bin/python3 |
AuthorJames Benson is an IT professional. 
Archives
August 2022
Categories
All
|
 RSS Feed
